
When replacing worn parts on your robotic pool cleaner, start by inspecting for signs like reduced cleaning performance, irregular movements, or damaged brushes and filters. Carefully remove old components like brushes, filters, or gears, and look for signs of wear such as fraying, cracks, or buildup. Install new parts securely, ensuring proper alignment and fit. Afterward, test the device to confirm smooth operation. Continue exploring to learn detailed steps for each component and keep your cleaner performing at its best.
Key Takeaways
- Inspect brushes, filters, and other components regularly for signs of wear, fraying, or damage before replacement.
- Carefully detach worn parts, clearing debris and checking for damage to ensure proper removal.
- Install new parts securely, aligning brushes and filters correctly, and ensuring all fasteners are tight.
- Test the robotic cleaner after replacement to confirm smooth operation and proper functionality.
- Check cables, power supply, and external shell for damage, replacing or repairing as necessary.
Recognizing Signs of Wear and Tear
Knowing how to spot signs of wear and tear on your robotic pool cleaner is essential to keep it running smoothly. One key indicator is your cleaner’s performance; if it’s missing spots or not covering the pool efficiently, it might be wearing out. Check for irregular movements, which can signal issues with robotic programming or mechanical parts. Additionally, pay attention to debris collection—if it’s collecting less debris than usual, filters or brushes could be worn. Changes in pool chemistry, like increased algae or cloudiness, can also hint at reduced cleaning effectiveness. Regularly inspecting brushes and bristles for signs of deterioration helps prevent further damage. Being aware of vibrational energy, which influences the machine’s operation, can help you troubleshoot and maintain optimal performance. Understanding mechanical wear patterns enables proactive maintenance and extends the lifespan of your cleaner. Staying attentive to these signs, including filter clogging and unusual noises, ensures you catch problems early and maintain ideal cleaning, saving you time and costly repairs later. Additionally, monitoring automation technology can help identify if programming adjustments are needed to improve cleaning efficiency. Recognizing subtle changes in robotic movement can also provide early clues to potential issues before they become major problems.
Replacing the Brushes and Bristles
Start by inspecting your brushes and bristles for signs of wear, like fraying or missing tufts. Then, carefully remove the old brushes from their mounts, making sure not to damage any connectors. Finally, install the new bristles securely, ensuring they are properly aligned for ideal cleaning performance. Regularly checking the dog breeds involved can help you select the best replacement parts for durability and effectiveness.
Identifying Wear and Tear
Over time, the brushes and bristles on your robotic pool cleaner can become worn down, reducing its effectiveness in scrubbing and sweeping debris. To identify wear and tear, inspect the brushes regularly for fraying, missing bristles, or uneven wear. If the cleaner struggles to clean edges or leaves debris behind, it may be a sign that the brushes need replacement. Additionally, worn brushes can affect robotic calibration, causing navigation issues. Keep your software updated to guarantee maximum performance and to receive any calibration improvements from the manufacturer. Regularly check for these signs:
- Frayed or missing bristles
- Uneven brush wear
- Reduced cleaning efficiency
- Navigation errors
- Outdated software versions
Proper brush maintenance ensures your robotic pool cleaner maintains optimal contact with surfaces, enhancing overall cleaning effectiveness. Incorporating proper maintenance practices can prolong the lifespan of your device and improve its cleaning performance. Regularly inspecting the brushes for wear and tear can help prevent further damage and ensure consistent cleaning results.
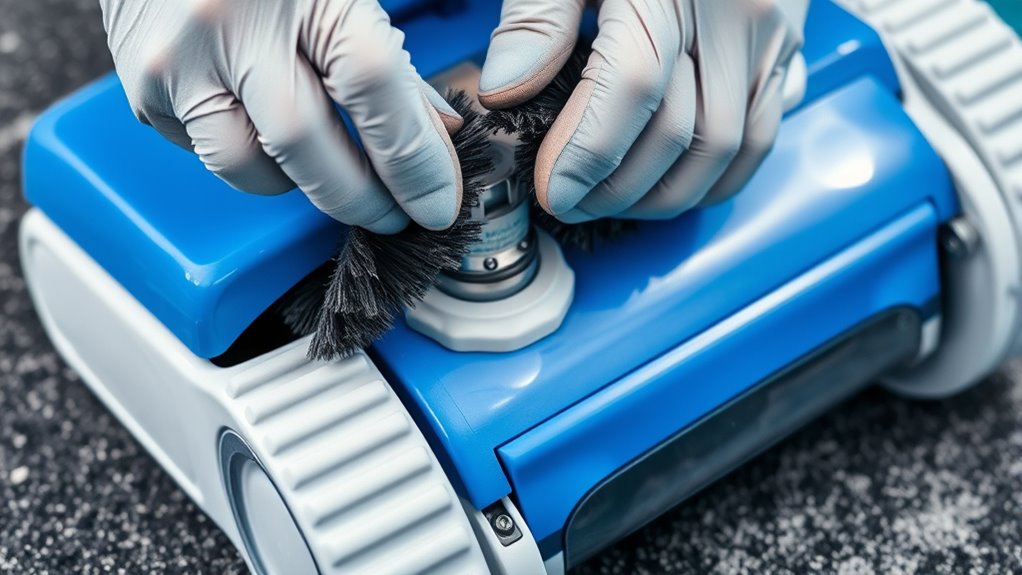
Removing Old Brushes
To replace the old brushes, you’ll need to remove them carefully from their mounts. Start by detaching the brushes from the cleaning brush assembly, ensuring you don’t damage any clips or connectors. Check for debris or buildup that might hinder removal. Once removed, inspect the brushes and bristles for wear and tear, replacing if necessary. While you’re at it, lubricate moving parts to keep the assembly functioning smoothly. Proper lubrication prevents future issues and prolongs the life of your cleaner. Regular maintenance of moving parts can help prevent common problems and ensure optimal performance. Additionally, understanding relationship patterns can be useful in maintaining consistent cleaning routines and avoiding unnecessary repairs. Ensuring proper cleaning and maintenance practices is essential for extending the lifespan of your pool cleaner. Properly inspecting and replacing worn parts like bristles can significantly improve the device’s efficiency and longevity. Being aware of AI vulnerabilities can help you stay vigilant about potential issues with automated systems. Use the table below for a quick reference on parts involved:
| Part Name | Function |
|---|---|
| Cleaning Brush Assembly | Holds brushes and bristles |
| Bristles | Scrubs and cleans the pool |
| Moving Parts | Enable brush rotation |
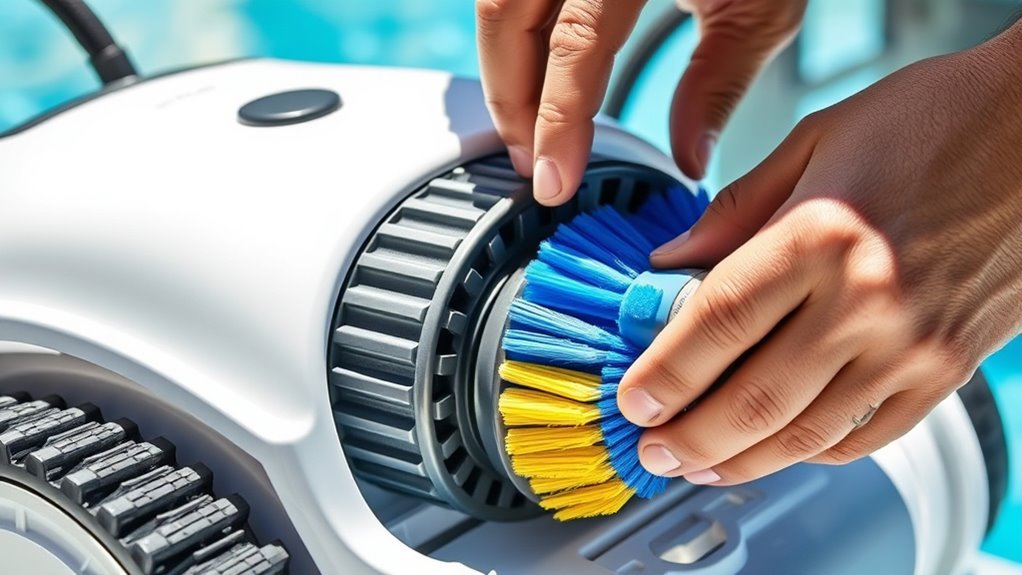
Installing New Bristles
After removing the old brushes, it’s time to install the new bristles. Proper bristle installation ensures your robotic pool cleaner functions efficiently. During brush replacement, make sure the new bristles are aligned correctly to match the old ones. Carefully snap or screw the new brushes into place, ensuring they’re secure. Remember, a proper fit prevents slipping or damage during operation. When handling the bristles, keep these tips in mind:
- Check for correct orientation before installation
- Make sure the brushes are fully seated
- Avoid forcing the bristles into place
- Confirm all fasteners are tight
- Test the cleaner after installation for smooth operation
- Be aware that brush compatibility and quality can affect the overall cleaning performance and longevity of your pool cleaner. Regular maintenance and using high-quality replacement parts can also help prevent malfunctions and extend your device’s lifespan. Additionally, understanding payment processing can be beneficial if you need to purchase parts online, ensuring secure and efficient transactions. Staying informed about robotic cleaner technology can help you select the best components for your specific model. Properly maintaining and replacing parts with high-quality materials can significantly enhance your pool cleaner’s durability and effectiveness.
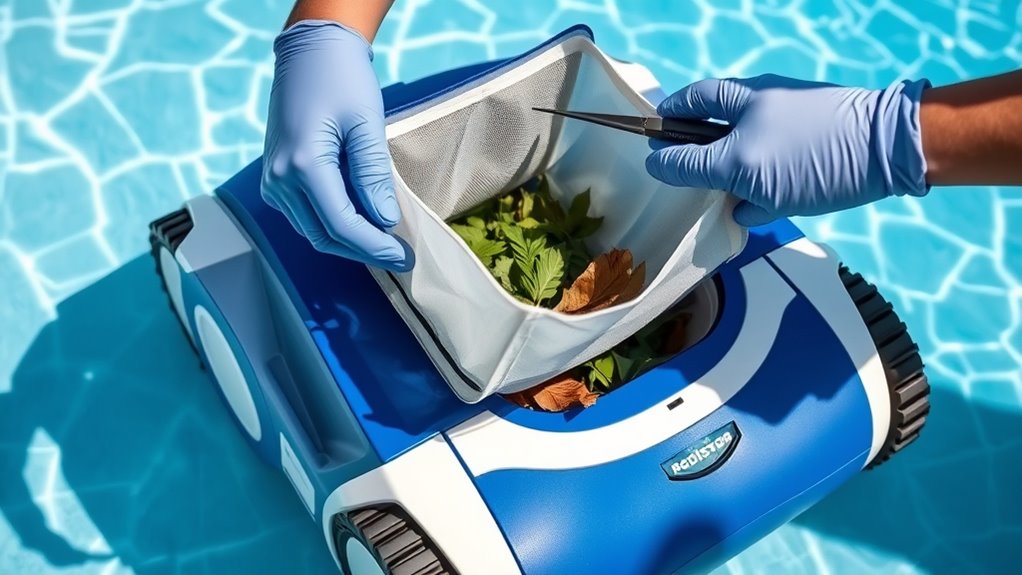
Swapping Out the Filter and Debris Bags
To swap out the filter and debris bags, start by removing the old filters carefully. Next, install the new bags, making sure they fit snugly in place. Always double-check that everything is secure to guarantee peak cleaning performance. Incorporating regular maintenance checks can also prolong the lifespan of your robotic pool cleaner preventing damage. Ensuring proper filter maintenance can help maintain optimal indoor air quality and system efficiency. Additionally, following manufacturer guidelines for Mazda Tuning upgrades can optimize your device’s performance and longevity.
Removing Old Filters
When it’s time to replace the filters on your robotic pool cleaner, start by turning off the device and unplugging it for safety. Carefully remove the old filter, taking note of how it fits into the housing. During filter replacement, inspect the filter for tears or excessive dirt buildup. To guarantee proper cleaning procedures, gently rinse the filter with a hose, avoiding harsh scrubbing. Keep these tips in mind:
- Handle filters gently to prevent damage
- Check for cracks or tears before reusing
- Clear debris from the filter housing
- Avoid using soap or harsh chemicals during cleaning
- Allow filters to dry completely before reinstallation
Removing old filters properly ensures your cleaner operates efficiently and prolongs its lifespan. Regular filter replacement and cleaning procedures keep your pool sparkling and your device functioning smoothly.
Installing New Bags
Once you’ve removed the old filters, it’s time to install the new debris bags. First, ensure the robot arm calibration is correct to avoid misalignment during installation. Carefully insert the new bags into the designated compartments, making sure they fit snugly. While installing, it’s a good idea to review the software update procedures to confirm your cleaner’s firmware is current, which can improve debris handling and bag recognition. Proper installation helps maintain ideal performance and prevents leaks. Once the bags are securely in place, double-check that all latches are engaged. If your device prompts for calibration or software updates afterward, follow those steps before resuming cleaning. This ensures your robotic pool cleaner runs efficiently and prolongs the life of its components.
Checking Proper Fit
After installing the new debris bags, it’s important to verify they fit properly. A proper fit ensures your robotic pool cleaner functions efficiently and prevents leaks or debris escape. Check that the bags sit snugly in their compartments and that the secure connection is tight. If the bags are loose, they can cause operational issues or damage. To confirm a proper fit:
- Ensure the bag edges align with the filter opening
- Press firmly to confirm the bag snaps into place
- Look for any gaps or bulges
- Confirm the lid or cover locks securely
- Gently tug to test the secure connection
Taking these steps guarantees your debris bags are correctly installed, maximizing cleaning performance and avoiding future problems. Proper fit is essential for smooth operation and long-lasting parts.
Installing New Drive Cogs and Gears
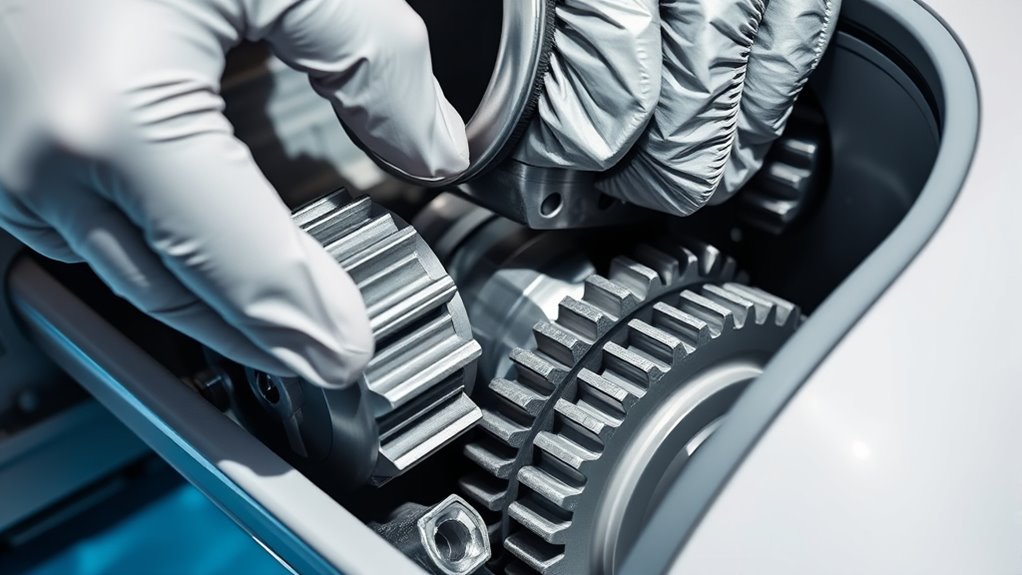
To install new drive cogs and gears, start by carefully removing the old, worn parts from the robot’s drive assembly. Make certain all debris is cleared, and the area is clean before fitting the new components. Once installed, you may need to perform robot calibration to ensure smooth operation and proper alignment. Check that the gears mesh correctly and turn freely without resistance. After installing, update the robot’s software to recognize the new parts and optimize performance. Software updates can also include firmware improvements that enhance drive efficiency. Test the robot’s movement to verify everything functions as expected. Proper installation and calibration prevent future wear and keep your pool cleaner running effectively. Regular updates and careful assembly help extend the lifespan of your robotic pool cleaner.
Changing the Power Supply and Cables
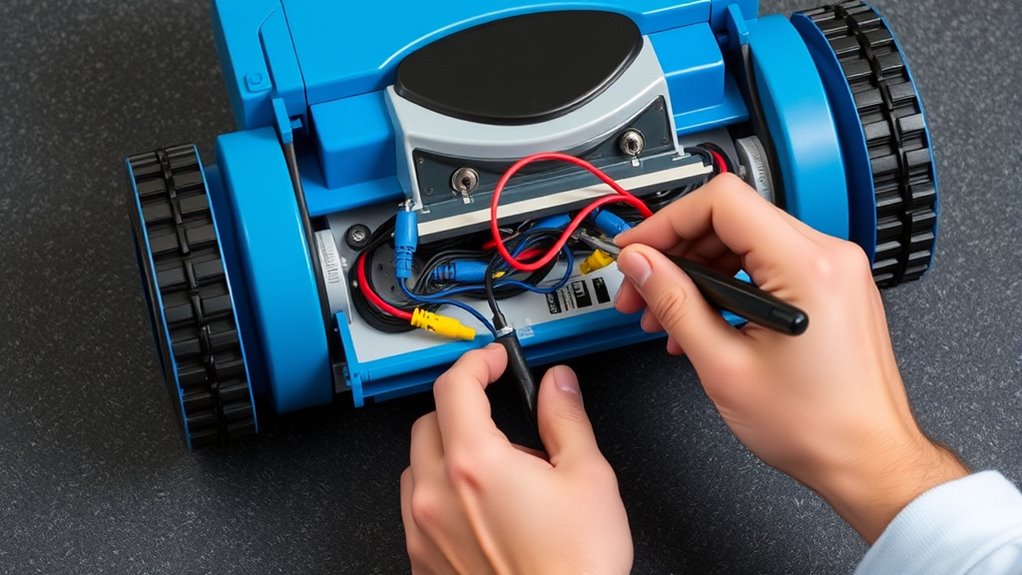
Before replacing the power supply and cables, unplug the robot from the power source to guarantee safety. Power supply troubleshooting helps identify if the issue stems from the unit itself or faulty cables. When performing cable replacement procedures, ensure you handle each connection carefully to avoid damage.
Always unplug the robot before replacing cables to ensure safety and prevent damage.
Remember these key points:
- Confirm the power source is disconnected before starting.
- Inspect cables for visible damage or corrosion.
- Use the correct replacement cables specified by your model.
- Secure all connections tightly to prevent loose contact.
- Test the new power supply and cables before submerging the robot again.
Following these steps ensures safe, effective maintenance and reduces the risk of future electrical issues. Proper cable replacement procedures help keep your robotic pool cleaner running smoothly.
Replacing the Wheels and Tracks
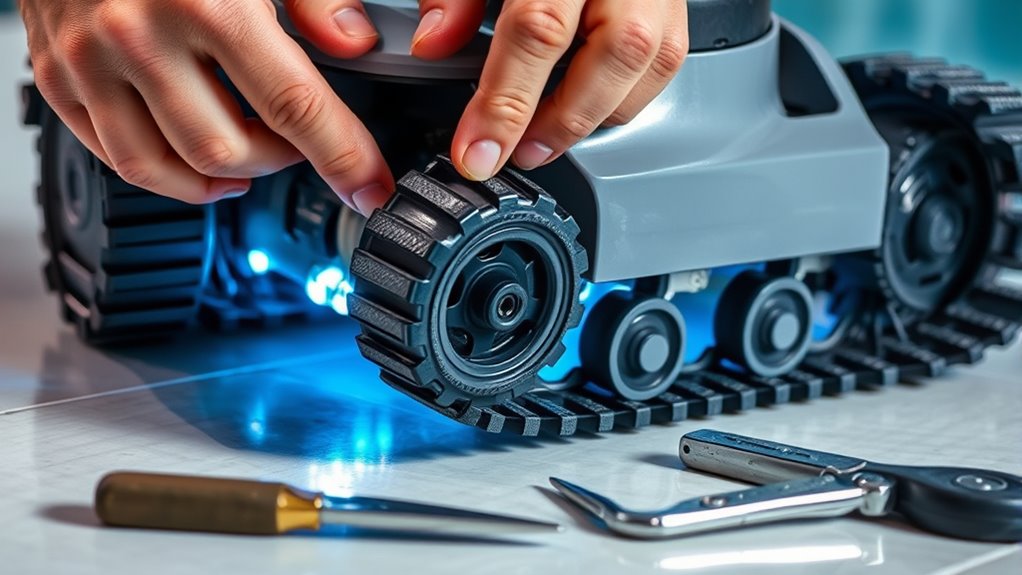
Replacing the wheels and tracks is a straightforward process that keeps your robotic pool cleaner operating efficiently. First, remove the old wheels or tracks, making sure to check the wheel alignment to guarantee proper fit. When installing new wheels, align them correctly to match the tread pattern, which helps maintain traction and smooth movement across the pool surface. If your cleaner has tracks, replace them carefully, ensuring they are tight enough to avoid slipping but not too tight to hinder rotation. Proper wheel alignment and matching the tread pattern are essential for peak performance. Take your time during installation to prevent damaging any components. Regularly inspecting and replacing worn wheels and tracks helps keep your cleaner running smoothly and extends its lifespan.
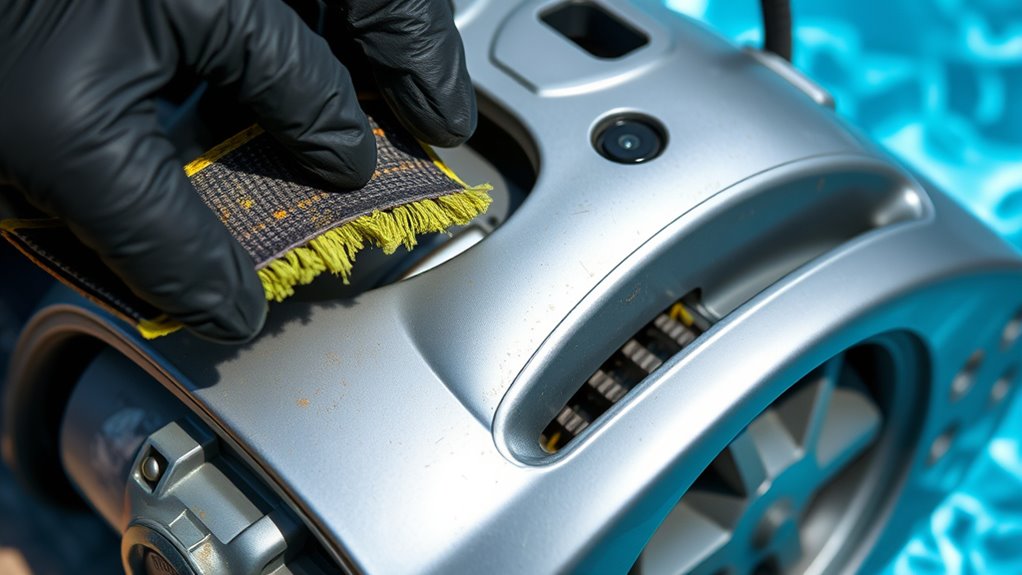
Maintaining and Inspecting the Robot’s Outer Shell

Regularly inspecting and maintaining the robot’s outer shell is essential for its ideal performance and longevity. Proper shell maintenance prevents damage, keeps the robot functioning efficiently, and extends its lifespan. Start by inspecting the exterior for cracks, chips, or signs of wear. Regular exterior cleaning removes dirt, algae, and debris that can cause corrosion or impair movement. To keep the shell in top condition, consider these tips:
- Use a soft cloth and mild soap for exterior cleaning
- Check for cracks or damage during each inspection
- Remove debris stuck in vents or around the shell
- Apply a protective sealant if recommended by the manufacturer
- Store the robot in a shaded, dry area when not in use
Consistent maintenance ensures your pool cleaner’s outer shell remains durable and effective.
Frequently Asked Questions
How Often Should I Replace Parts on My Robotic Pool Cleaner?
You should check your robotic pool cleaner regularly to determine when parts need replacing. Follow your maintenance schedule, which usually suggests inspecting brushes, filters, and wheels every few months. Keep warranty considerations in mind; replacing parts outside the recommended timeframe might affect coverage. By staying proactive, you guarantee your cleaner runs efficiently, prolongs its lifespan, and stays within warranty, saving you time and money in the long run.
Can I Replace Parts Myself or Should I Hire a Professional?
You can definitely try a DIY repair if you’re comfortable with minor tasks and have the right tools. Replacing worn parts on your robotic pool cleaner is often straightforward, but for complex issues or if you’re unsure, professional servicing is a safer choice. It guarantees proper repair and prevents further damage. Assess your skills first; if in doubt, hiring a professional guarantees your cleaner stays in top condition.
Are Genuine Replacement Parts Necessary for Optimal Performance?
You might wonder if genuine parts are necessary for your robotic pool cleaner’s ideal performance. Using genuine parts ensures compatibility, durability, and reliable operation, which aftermarket options may lack. While non-genuine parts can sometimes be cheaper, they often compromise performance and longevity. For the best results and to keep your cleaner functioning smoothly, it’s wise to choose genuine replacement parts. This investment helps maintain your pool cleaner’s efficiency and extends its lifespan.
What Tools Are Required for Replacing Worn Components?
Did you know that most repairs take less than 30 minutes? For replacing worn components, you’ll need a basic tool kit with screwdrivers, pliers, and possibly a wrench. Check the replacement guides specific to your robotic pool cleaner to identify the right tools. Having these on hand makes the process smoother and guarantees you don’t miss anything, helping your cleaner run like new.
How Do I Dispose of Old or Damaged Parts Responsibly?
When disposing of old or damaged parts, you should prioritize environmentally friendly disposal. Check if your local recycling centers accept plastic or electronic waste, as many parts can be recycled. Avoid throwing these items in regular trash to reduce environmental impact. Some manufacturers also offer recycling options or take-back programs. By recycling or properly disposing of your parts, you help protect the environment and support sustainable practices.
Conclusion
By regularly inspecting and replacing worn parts, you keep your robotic pool cleaner running smoothly. Don’t wait until it’s too late—address issues early to save time and money. Think of it as giving your device a tune-up before it throws a wrench in your plans. Staying proactive guarantees your pool stays sparkling clean and your robot lasts longer. With a little effort, you’ll keep your pool equipment in tip-top shape, avoiding unnecessary headaches down the line.