
Choose and prepare a portable camping lantern, then place and operate it so your campsite has useful light after dark. This guide is for beginner campers comparing battery-powered, rechargeable, and fuel-burning lanterns. Allow about 20-30 minutes to check a lantern and its power supply before a trip; setting it up at camp usually takes 2-5 minutes.

Get travel and outdoor gear delivered free with Prime
- Fast, free delivery on millions of items
- Prime Video, Amazon Music and more included
- Member-only deals all year

Lichamp LED Camping Lantern, 4-Pack, Gray
- ✔ Pack size: 4 lanterns
- ✔ Brightness: Up to 350 lumens
- ✔ Coverage: 360 degrees; up to 97 sq. ft.

XTAUTO Collapsible Solar and USB Rechargeable LED Camping Lantern, 4-Pack
- ✔ Pack size: 4 lanterns
- ✔ Charging: Solar and USB
- ✔ Battery capacity: 1,600 mAh

Etekcity Battery-Operated LED Camping Lanterns, 2-Pack
- ✔ Pack size: 2 lanterns
- ✔ Maximum brightness: 154 lumens
- ✔ Lighting angle: 360 degrees
Difficulty: Beginner | Time: 20-30 minutes to choose and prepare; setup takes 2-5 minutes
What You’ll Need
Tools & Materials:
- Portable camping lantern with its manual
- Compatible batteries, charged battery pack, or approved fuel, depending on lantern type
- Charging cable and power source for a rechargeable lantern
- Dry cloth for wiping the lantern
Knowledge:
- Basic ability to follow product instructions
- Awareness of your campsite layout and where people will walk or sleep
Check the manual for the lantern’s approved batteries or fuel, charging method, operating limits, and care instructions. If using a fuel-burning model, learn its lighting and shutdown procedure before the trip. Never use a fuel lantern inside a tent, vehicle, or other enclosed space.
Lichamp LED Camping Lantern, 4-Pack, Gray
The Lichamp set is the most straightforward choice when we want several lanterns to light a shared campsite. Each unit provides up to 350 lumens with 360-degree coverage, a stronger stated output than Etekcity’s 154 lumens. Four collapsible lanterns also make it practical to spread light among a cooking area, tent entrance, and other spots rather than relying on one lamp for everything.Its tradeoff is the power plan. Each lantern takes three AA batteries, which are not included, so using the full set means bringing twelve batteries and replacing them as needed. Unlike XTAUTO, Lichamp has no listed solar or USB charging option. Foldaway handles support carrying and hanging, and water-resistant plastic suits ordinary outdoor use, but the source’s voltage information is inconsistent. That makes it sensible to lean on the clearer lumen and battery specifications when comparing it. We rank it first for dependable stated area brightness and quantity, while buyers who prioritize recharging or extended runtime should look to XTAUTO or Etekcity.
Pros:
- Four lanterns with 360-degree, up to 350-lumen lighting
- Collapsible bodies and foldaway handles support carrying and hanging
- Water-resistant plastic construction for outdoor and emergency use
- Listed runtime of up to 30 hours per lantern
Cons:
- Requires three AA batteries per lantern; batteries are not included
- Source specifications list battery and lantern voltage inconsistently
- No rechargeable or solar charging option is listed
Best for: Campers who want four bright, collapsible lanterns to light multiple areas around a group campsite.
Not ideal for: Campers who want rechargeable power, a clearly specified voltage, or a set that includes its batteries.
Bottom line: We recommend Lichamp for campsites that need broad, bright light from several portable lanterns and can accommodate spare AA batteries.
“We recommend Lichamp for campsites that need broad, bright light from several portable lanterns and can accommodate spare AA batteries.”
XTAUTO Collapsible Solar and USB Rechargeable LED Camping Lantern, 4-Pack
XTAUTO suits campers who would rather recharge than plan around a pile of disposable batteries. Its 1,600 mAh battery accepts USB or solar charging, and each of the four lanterns can also work as a flashlight. That combination gives it more ways to serve around camp than the Lichamp set, which is designed for lantern lighting and takes AA batteries. Raising the collapsible body adjusts brightness, making it possible to tune the light rather than treating it as a single fixed setting.The gap in its specifications is meaningful: no lumen output or charging time is provided. We can’t tell from the supplied details how brightly it will light a large cooking area or how quickly solar or USB power restores a charge. Its stated runtime reaches up to 25 hours, below Lichamp’s 30-hour figure and Etekcity’s 50-hour maximum. The product is described as waterproof, but buyers who need a quantified brightness comparison should favor the documented outputs of the other two. We place XTAUTO second because its charging options and flashlight mode improve versatility, while missing output details limit confidence for area-lighting decisions.
Pros:
- Solar and USB charging give campers two ways to replenish the battery
- Can be used as a lantern or flashlight
- Collapsible shape and folding handle support packing, carrying, and hanging
- Four units are included, with up to 25 hours of stated light per charge
Cons:
- Brightness output is not specified, limiting comparison with Lichamp and Etekcity
- Charging time is not listed
- Stated maximum runtime is shorter than Etekcity’s 50-hour figure
Best for: Campers who want four multipurpose lights and the option to recharge by USB or solar.
Not ideal for: Buyers who need a stated lumen level, a known charging time, or the longest listed runtime.
Bottom line: We’d choose XTAUTO when rechargeable flexibility and flashlight use matter more than having a published lumen rating.
“We’d choose XTAUTO when rechargeable flexibility and flashlight use matter more than having a published lumen rating.”
Etekcity Battery-Operated LED Camping Lanterns, 2-Pack
Etekcity is the runtime pick for campers who want to stretch a set of batteries over multiple evenings. Each lantern is listed for up to 50 hours, the longest maximum in this group, and its brightness changes as we raise or lower the collapsible body. That lets us dial back the light when a dimmer setting is enough, while the two-pack keeps the load smaller than either four-lantern set.The cost of that longer stated runtime is lower maximum output: 154 lumens is well below Lichamp’s 350 lumens. Etekcity is a better fit for tent interiors, close-up tasks, or campers who value battery endurance over lighting a wide shared area. Like Lichamp, it uses three AA batteries per lantern and has no listed rechargeable option, so it does not match XTAUTO for power-source flexibility. Its water-resistant ABS body and small storage compartment add practical touches, though they do not change the basic tradeoff. We rank it third overall because its light output is more limited, but it can be the right choice when long runtime and a compact two-unit set take priority.
Pros:
- Up to 50 hours of stated runtime per lantern
- Brightness adjusts by raising or lowering the collapsible lantern
- Two-pack is suitable when a larger set would be unnecessary
- Water-resistant ABS body includes a storage compartment
Cons:
- Maximum brightness is 154 lumens, lower than Lichamp’s listed output
- Requires three AA batteries per lantern
- No rechargeable charging method is listed
Best for: Campers who prefer a two-lantern set with a long stated runtime for tent use or modest campsite lighting.
Not ideal for: Groups who need high-output area lighting or campers who want USB or solar charging.
Bottom line: Etekcity makes the most sense when we value long stated runtime and a smaller set more than maximum brightness.
“Etekcity makes the most sense when we value long stated runtime and a smaller set more than maximum brightness.”
As an Amazon Associate we earn from qualifying purchases.
Before You Start
Decide what you need the lantern to light: a shared table, a cooking area, or a small tent interior. One lantern may not light every area well. Check the forecast and expected trip length, and pack spare power appropriate to the model. Keep fuel, batteries, and charging equipment stored as directed by the manufacturer, away from heat and damage.
Inspect the lantern before relying on it. Do not use it if the casing, lens, battery compartment, cable, seals, or fuel parts are damaged. For fuel models, follow the manual’s ventilation and clearance rules, and keep the hot lantern away from fabric, dry grass, and anything that can burn.
Step-by-Step Instructions
Step 1: Choose a lantern type
Match the power source to your trip. Battery lanterns are simple to operate and suit short trips when you can carry spare batteries. Rechargeable lanterns work well when you can charge them before leaving or have a compatible way to recharge them. Fuel lanterns can provide sustained light but require careful handling, ventilation, and fuel storage.
Check the product’s stated runtime at the brightness settings you expect to use, its weight, weather rating, and whether it can stand or hang where you need it. Treat runtime as an estimate; cold temperatures and high brightness can reduce battery performance.
Tip: Pick for the place you will use it. A bright lantern is less helpful if it cannot sit securely on your table or hang from an appropriate support.
Check: You can name the lantern’s power source, intended location, and the compatible supplies you need to bring.
Step 2: Check brightness and light modes
Compare the lantern’s brightness settings and controls. Use a lower setting for close tasks such as reading or sitting at a table, and reserve higher output for cooking or finding gear. If the lantern has a red-light or dim mode, check how to select it before dark.
Look at the beam pattern if the product information provides one. A lantern that spreads light in several directions can work well for a group, while a more focused beam may suit a smaller area. Avoid choosing solely by the highest brightness figure; runtime and glare matter at camp too.
Tip: If you already own the lantern, turn it on briefly in a dim room to learn the controls and see whether its light feels comfortable.
Check: You know how to turn the lantern on, adjust its brightness, and select any mode you expect to use.
Step 3: Prepare the power source
For a battery lantern, open the compartment as instructed and install the specified battery type in the marked orientation. Close and latch the cover fully. For a rechargeable lantern, charge it with the supplied or approved cable, then disconnect it and confirm the charge indicator behaves as the manual describes. For a fuel lantern, use only the specified fuel and prepare it outdoors according to the manual.
Pack spare batteries, a charged power bank, or additional approved fuel when the trip length or remote location calls for backup. Do not mix battery types or reuse batteries in ways the manufacturer prohibits.
Tip: Do not force a battery door, plug, or fuel fitting. Resistance can signal incorrect alignment or an incompatible part.
Check: The lantern powers on, the battery cover is secure, or the fuel setup passes the manual’s pre-use check.
Step 4: Test the lantern before departure
Switch the lantern through the modes you plan to use and leave it on for a few minutes. Confirm that the light stays steady and the controls respond. Check for unusual heat, odor, noise, flickering, leaking, or a charging fault. Turn it off if anything seems wrong and consult the manual instead of taking a faulty lantern on the trip.
For a fuel model, perform the manual’s leak and ignition checks outside, away from flammable materials. Let the lantern cool fully before handling or packing it.
Tip: A short test catches dead batteries, an incomplete charge, and unfamiliar controls while you still have time to fix the issue.
Check: The lantern turns on and off reliably, changes settings as expected, and shows no signs of damage or malfunction.
Step 5: Place the lantern at camp
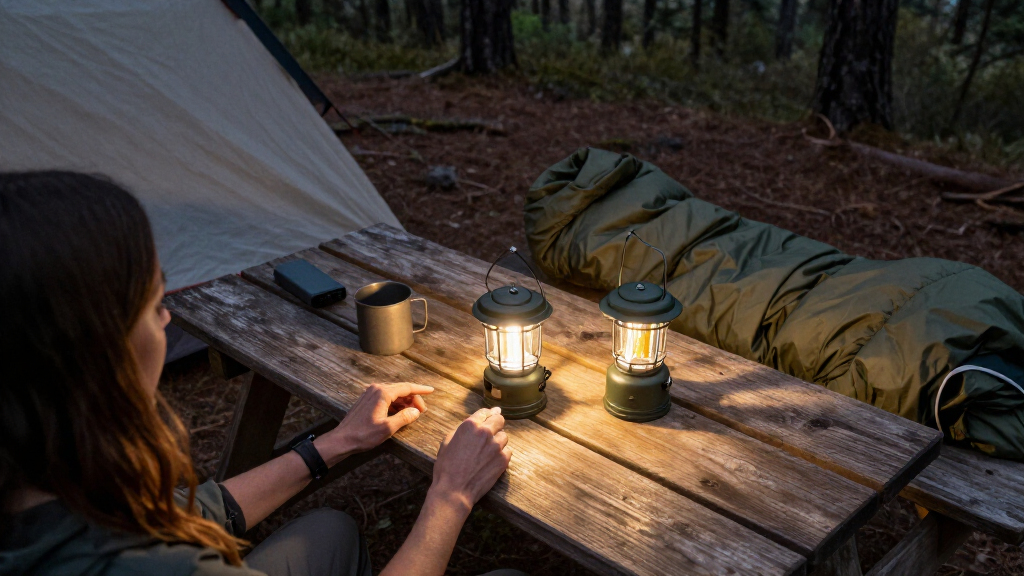
Set the lantern on a stable, level surface or hang it only from a support approved for its weight and design. Place it where it lights the activity area without shining directly into people’s eyes. Keep it clear of tent fabric, sleeping bags, dry vegetation, cooking flames, and busy walkways.
For a fuel-burning lantern, use it outdoors with the clearances and ventilation specified in the manual. Never use it inside a tent, camper, vehicle, or enclosed shelter because combustion can create carbon monoxide and fire risk.
Tip: Check that the lantern cannot be knocked over when someone reaches for gear or walks past in the dark.
Check: The light reaches the area you need, stays stable, and does not obstruct paths or contact combustible materials.
Step 6: Operate it to match the task
Start at a low or medium setting, then increase brightness only if the task requires it. Turn the lantern off when you leave the area or go to sleep, unless the manual specifically describes a safe low-power use that fits your situation. Keep children and pets from touching a hot lantern, and do not move a fuel model while it is lit or hot.
Watch the charge or fuel level during use. If light output drops, switch to a lower setting or replace or recharge the power source as directed. Do not open a hot lantern or battery compartment while it is operating.
Tip: Lower settings reduce glare and usually extend battery runtime.
Check: The lantern gives enough light for the activity, remains in a safe position, and is switched off when no longer needed.
Step 7: Shut down and pack it
Turn the lantern off using its normal control. For fuel models, follow the exact shutdown procedure and wait until the lantern is completely cool before moving it. Disconnect charging equipment and pack the lantern dry in a padded or protected spot where its lens and controls will not be crushed.
Store batteries and fuel according to the manufacturer’s instructions. Remove batteries for long-term storage if the manual recommends it. After the trip, wipe off dirt and moisture, inspect for damage, and recharge or replace the power source before the next outing.
Tip: Keep fuel separate from ignition sources and store it only in an approved container.
Check: The lantern is off and cool, its parts are protected, and its power supply is stored or replenished as directed.
Common Mistakes to Avoid
- Packing a lantern without testing its batteries or charge. — Power it on and check its controls before departure; bring compatible backup power for longer or remote trips.
- Using a fuel lantern inside a tent or vehicle. — Operate fuel-burning lanterns outdoors only, following the manual’s ventilation and clearance instructions.
- Running the lantern at maximum brightness all evening. — Use the lowest setting that suits the task to reduce glare and extend runtime.
- Placing the lantern where it can fall or touch fabric. — Choose a level surface or approved hanging point, away from walkways and combustible materials.
Troubleshooting
Problem: The lantern does not turn on.
Solution: Switch it off, then check battery orientation, charge level, connector seating, and the battery-compartment latch. Use only the power source specified in the manual. For a fuel model, follow its priming and ignition instructions outdoors; stop if you smell leaking fuel.
Problem: The light flickers or dims unexpectedly.
Solution: Check whether the batteries are depleted, the rechargeable unit needs charging, or the fuel supply is low. Let the lantern cool if applicable, then inspect connections and contacts for moisture or dirt. Do not keep using a lantern with damaged parts.
Problem: The lantern feels too bright or causes glare.
Solution: Lower the brightness, use a diffused or red-light mode if available, or move the lantern farther from eye level. Aim light toward the work surface rather than faces.
Problem: A rechargeable lantern will not charge.
Solution: Try the manufacturer-approved cable and power adapter, check the port for moisture or debris, and review the indicator behavior in the manual. Do not charge a wet or damaged lantern; contact the manufacturer if the fault continues.
What Success Looks Like
The lantern powers on reliably, provides suitable light at the chosen setting, and remains stable in a safe outdoor location. You know how to monitor and replenish its power, turn it off, and store it correctly. For fuel models, you operate and cool the unit only as the manual directs and never use it in an enclosed space.
Next Steps
After each trip, clean and dry the lantern, inspect its casing and power connections, and recharge it or replace depleted batteries. Store it with the compatible supplies and manual so it is ready for the next outing. Replace damaged parts or retire the lantern if it no longer operates safely.
Frequently Asked Questions
How many lumens should a camping lantern have?
Choose brightness based on the area and task rather than a single target number. A lower setting often suits a small tent or reading spot; a larger shared area may need more output. Check whether the lantern lets you adjust brightness so one device can serve both situations.
Can I leave a camping lantern on all night?
Follow the manufacturer’s instructions and consider runtime, heat, and placement. Turn it off before sleeping unless the manual explicitly permits the intended use. Keep it away from bedding and tent fabric, and never leave a fuel-burning lantern inside an enclosed shelter.
Are rechargeable or battery lanterns better for camping?
Either can work. Rechargeable models avoid disposable batteries when you can charge them and carry a suitable backup. Battery models are convenient when spare batteries are easy to pack and replace. Compare runtime, cold-weather performance, and charging options for your trip.
Can I use a fuel lantern in my tent?
No. Use a fuel-burning lantern outdoors only, following the model’s clearance and ventilation instructions. Combustion can produce carbon monoxide and heat that can ignite tent materials.
Fall Picks
fall essentials
As an affiliate, we earn on qualifying purchases.